When you upload a file to your site’s Media Library, a unique URL (also called a link or path) is created. You can use this URL to share the file, add it to your site, or link to it from anywhere on the web. This guide explains how file URLs are structured and how to find them.
In this guide
When you upload a file to your site’s Media Library, a unique URL (also called a link or path) is created. This URL consists of the following elements:
- Your site’s primary address.
- The media directory (usually
wp-content/uploads). - The date the file was uploaded.
- The name you gave the media file.
For example, https://yourgroovysite.com/wp-content/uploads/2023/01/mygroovyfilename.jpg.
Every image, video, audio file, and document has a unique URL (also called a link). Follow these steps to find the URL:
- Visit your site’s dashboard and navigate to Media.
- Click on the media file you want to access.
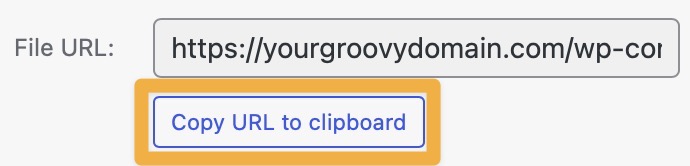
- Locate the File URL box.
- Click the “Copy URL to clipboard” button next to the link to copy the URL to your clipboard so you can paste/share the media elsewhere.
Once you upload a media file to your Media Library, you cannot directly change the file’s name. However, you can rename the file on your computer and re-upload it to your site’s media. Remember to replace the file wherever you have added it before deleting the original.
If you don’t have the original file on your computer, visit your site’s Media to download the file you want to change the name of.
Every file name on WordPress is unique. If you upload a new version of an image or other media item with the same file name, a number will be added to the end of the file name; for example: mygroovyfilename-1.jpg.
However, if you want to replace a file and keep the same URL, you have a couple of options:
If you need to replace a media file, you can delete the existing file and upload a new one with the same name. Follow these steps to delete the media and upload a new file.
- Ensure you have a copy of the file on your computer, then delete the media item from your site.
- Upload a new file with the same file name.
- If the file appears in pages or posts, check that the new version displays correctly.
If you require an unchanged link for sharing purposes, insert the file onto a page (PDFs can be embedded with the File block) so that you can share the same page URL while replacing the media item as often as needed. Follow these steps to create a page for your file:
- In your site’s dashboard, navigate to Pages or Posts to create or edit a page or post.
- Insert the media file, using the appropriate type of block:
- File block: great for PDFs and other downloadable files.
- Image block: use an image or gallery block for images, photos, etc.
- VideoPress block: embed videos using our fast video hosting services.
- Audio block: add audio clips, songs, or podcasts.
- Publish your content, and share the page or post.
On plugin enabled sites, there are third-party plugins that can replace media files that use the same file name. One example of a third-party plugin that is commonly used is Enable Media Replace. You can search for similar plugins as well.