If you’re just getting started with your website, you may need to activate the full features of your Business plan. This guide lists all the ways to activate the Business plan you’ve purchased.
In this guide
You have just purchased the Business plan for your website, and your site is ready to install its first plugin or theme or use the full force of your WordPress hosting features. Commerce plan sites are automatically activated.
You may have activated your Business plan’s features without even noticing. If your Business plan has not been activated, you can take any of the actions described below to activate it. Activating your Business plan is a one-time action you will never need to do again for your site.
Upon activating your Business plan, your website’s default site address will change from example.wordpress.com to example.wpcomstaging.com. The old .wordpress.com address will continue to work, but it will redirect to the wpcomstaging.com address. You can register, connect, or transfer a domain to your site to use publicly instead of the default site address.
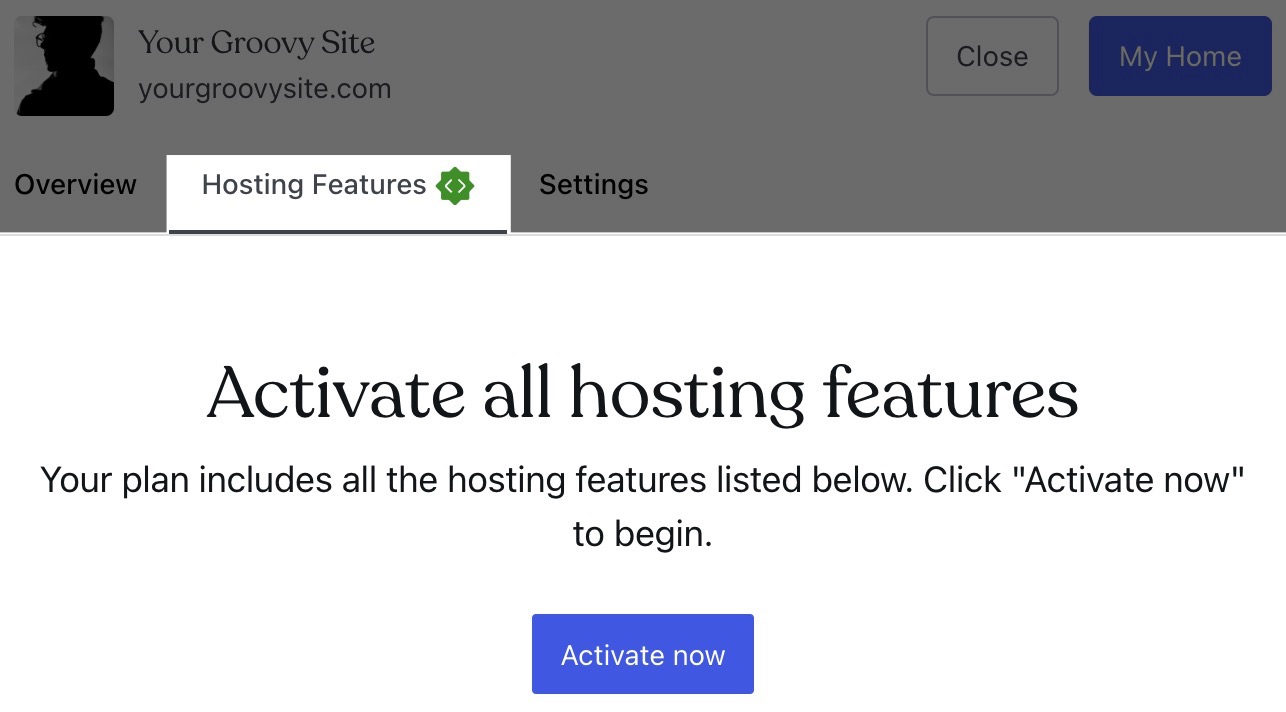
To activate your Business plan’s features, you can:
- Visit the Sites page in your dashboard.
- Click on the site title in the list of your sites.
- Click on the “Hosting Features” tab on the site overview page.
- Click on the “Activate now” button:
If you do not see the “Hosting Features” tab, your hosting features are already active.
Another method to activate your plan’s features is via your site’s backups. We’ll already start saving backups if you activated hosting access as described in the previous section, but you can also activate your plan’s features with these steps:
- Visit your site’s dashboard.
- Navigate to Jetpack → Backup.
- Click the “Activate Jetpack VaultPress Backup now” button.
If instead of the button, you see the latest backup and a “Restore” button, it means backups are already active.
To activate your Business plan’s features, you can:
- Visit your website’s dashboard.
- On the left side, click on Plugins.
- Choose any plugin you want, and click the “Install and activate” button.
You may need to make sure SSL is active before installing a plugin.
For more information, visit our guide on installing a plugin.
To activate your Business plan’s features, you can:
- Visit your site’s dashboard.
- Navigate to Appearance → Themes.
- Click the “Install new theme” button in the top right corner.
- Click the “Continue” button and choose the file from your computer.
- Click the “Install Now” button.
For more information, visit our guide on uploading a theme.