
Contests are a great way to engage your audience, grow your social following, and build your contact list. Hive makes it simple to set them up, whether you want a multi-step contest or a quick text-to-win giveaway.
Getting started
You can start a new contest in your Hive account from a few different places.
From scratch
Go to Capture > Contests in the left sidebar.
Click + New Contest in the top right corner.
Duplicating a contest
Duplicating a contest is helpful when you want to save time by reusing elements you’ve already set up. It allows you to copy over existing details like contest copy, terms and conditions, and entry steps—so you can quickly launch a new contest without starting from scratch.
Go to Capture > Contests.
Find the contest you want to copy.
Click the duplicate contest icon.
From the events page
Go to your event in the Events Hub.
Click Marketing Activities.
Select + New Contest.

The contest will automatically link to the event, pulling in the event’s name and image. This saves setup time and ensures that any ticket sales generated through the contest are properly attributed back to the event. It’s especially useful for event-specific promotions like ticket giveaways, VIP upgrades, or sponsor activations.
Creating a contest
Contest details
Contest title: what registrants will see on the contest page
Contest description: explain what participants are entering and what they can win (Markdown supported for content formatting)
Contest start and end dates
Auto-select winners: choose if Hive should automatically pick winners and how many.
Note: Auto-selecting winners does not automatically notify them—you’ll need to set up an automation. Instructions for doing this are included at the bottom of this article.
Contest design
Upload a contest image, set your brand color, and edit text to match your brand.
Custom opt-in
Customize the opt-in messaging shown to participants.
Optionally, add entrants to a specific segment.
Note: If you are partnering with another brand and plan to share contest registrant data, make this clear to entrants. Add a custom opt-in, and place all contacts who select “yes” into a dedicated segment. This makes it easy to isolate and export the data for your partner after the contest.
Advanced options
Add an opt-in checkbox
Choose how contacts can sign up (Facebook, manual, or both)
Set a post-completion redirect URL- example, redirect contacts to your event calendar on your website
Add custom terms and conditions
Insert a tracking pixel/s
Click Save to move on to contest steps.
Note: To let people enter by texting a keyword, set up your contest as a text-to-win. For setup steps, see this article.
Adding contest steps
At the top of the contest steps section, you can choose whether to display all steps on a single page or show each step on its own page. By default, all steps appear on one page. If you switch to one step per page, keep in mind this may increase drop-off, as some contacts may not complete all the social actions before reaching the end.
Steps give fans multiple ways to enter and gain more chances to win, such as:
Liking or following on social media
Sharing a post
Subscribing to your newsletter
For each step you add, you can assign different entry values (for example, more entries for higher-value actions)
Note: Track clicks on contest actions (note: Facebook and Instagram do not confirm follows or likes)
After saving
After you click save at the bottom of the contest steps page, you’ll be taken to the automation section in Hive. An automation will be created and toggled on automatically- all you need to do is push ‘SAVE AUTOMATION’ in the upper right-hand corner.
This automation sends a confirmation email to entrants letting them know their submission was successful, shows them how many points they earned, and encourages them to share the contest.
If you’d like, you can click customize email automation to edit the confirmation email and tailor it to your brand.
If the pop-up no longer appears, open the contest, scroll to Follow-up emails, and click Automations.
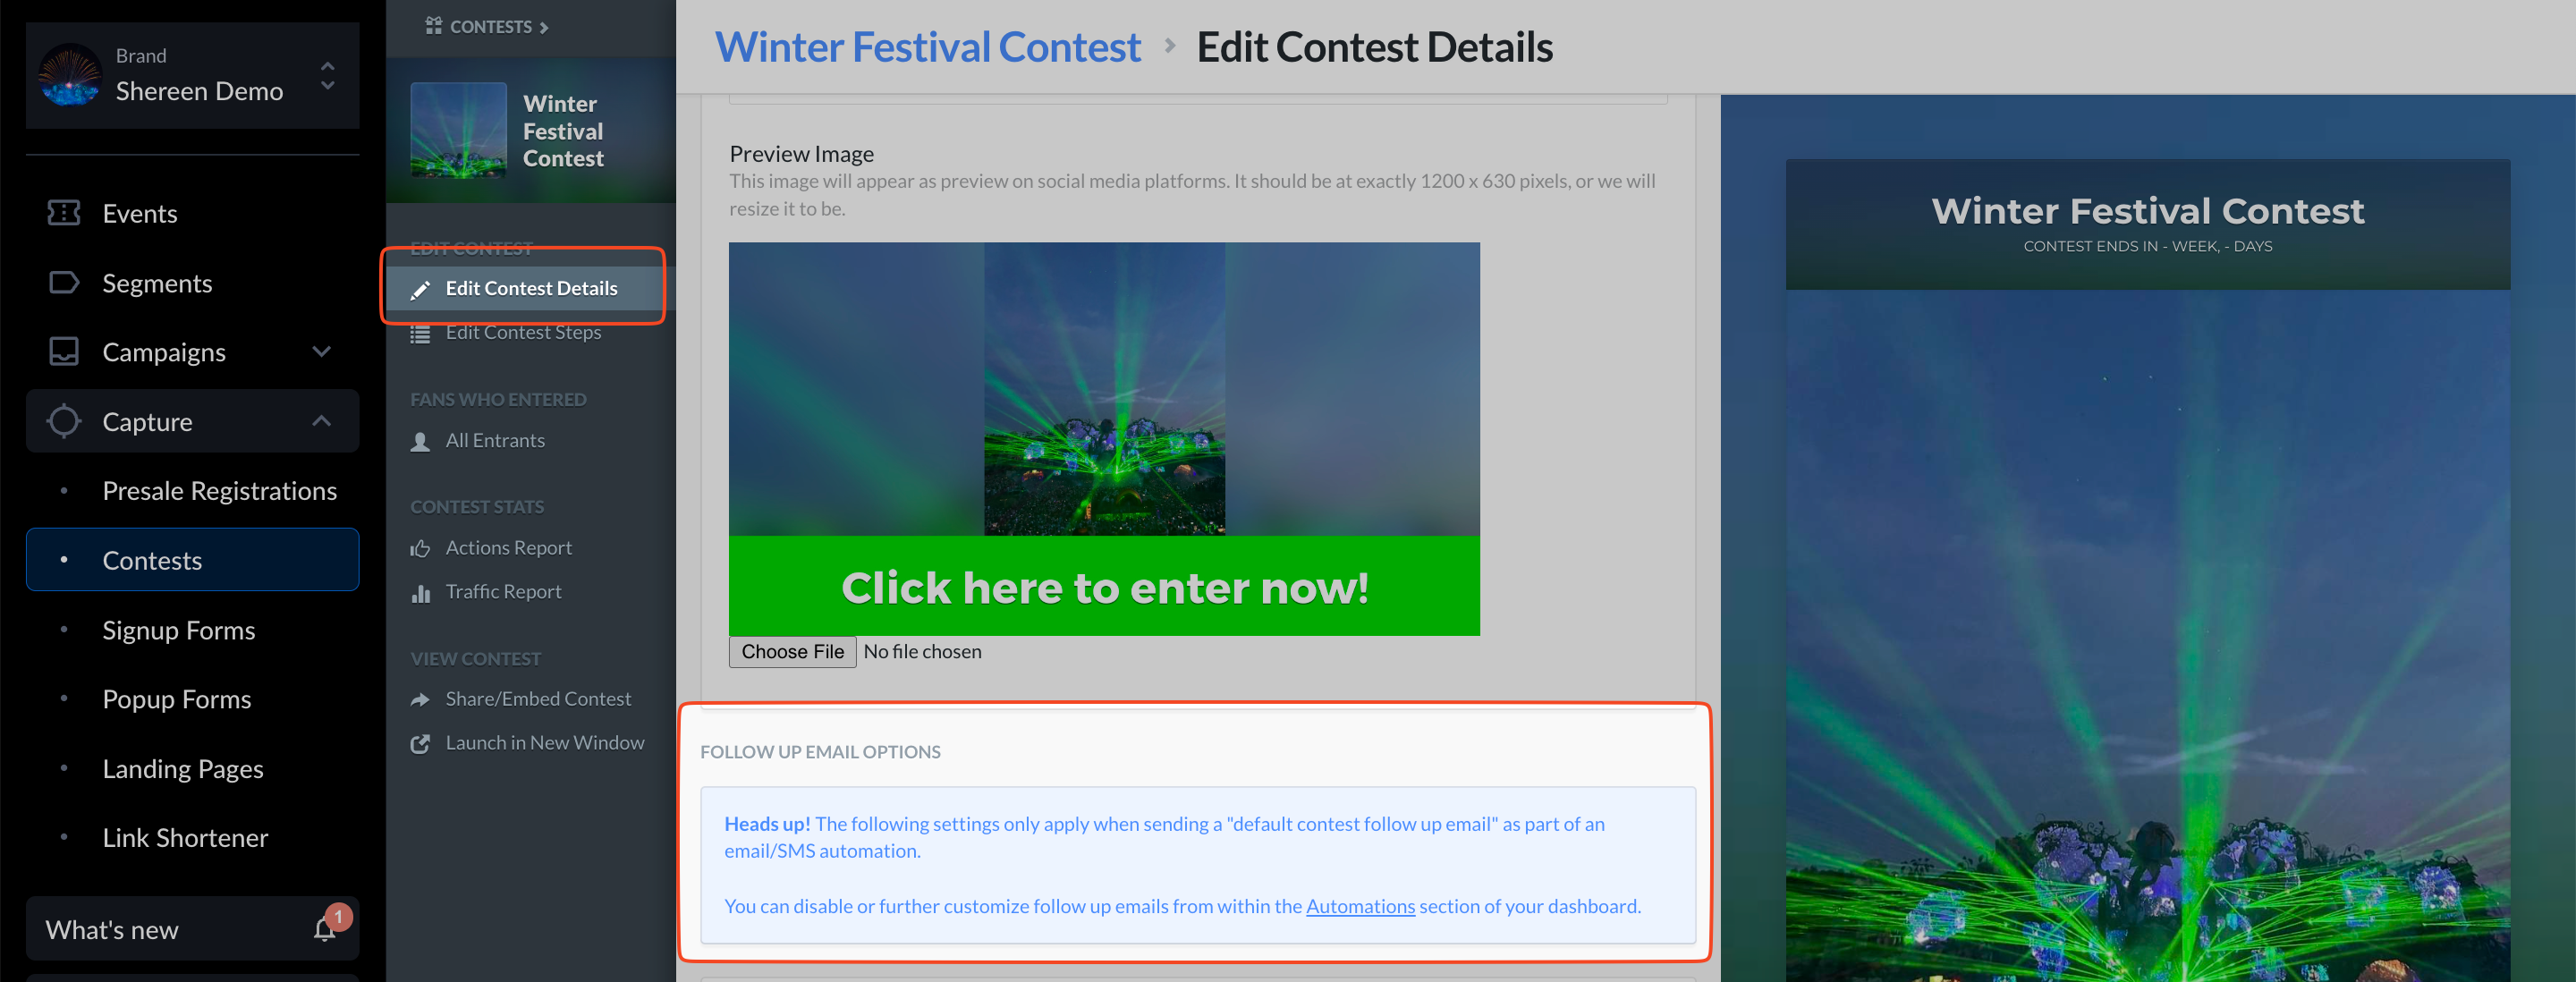
In your automation, if you don’t want to use the non-customizable default email, delete it, click Add action, and create a custom email.

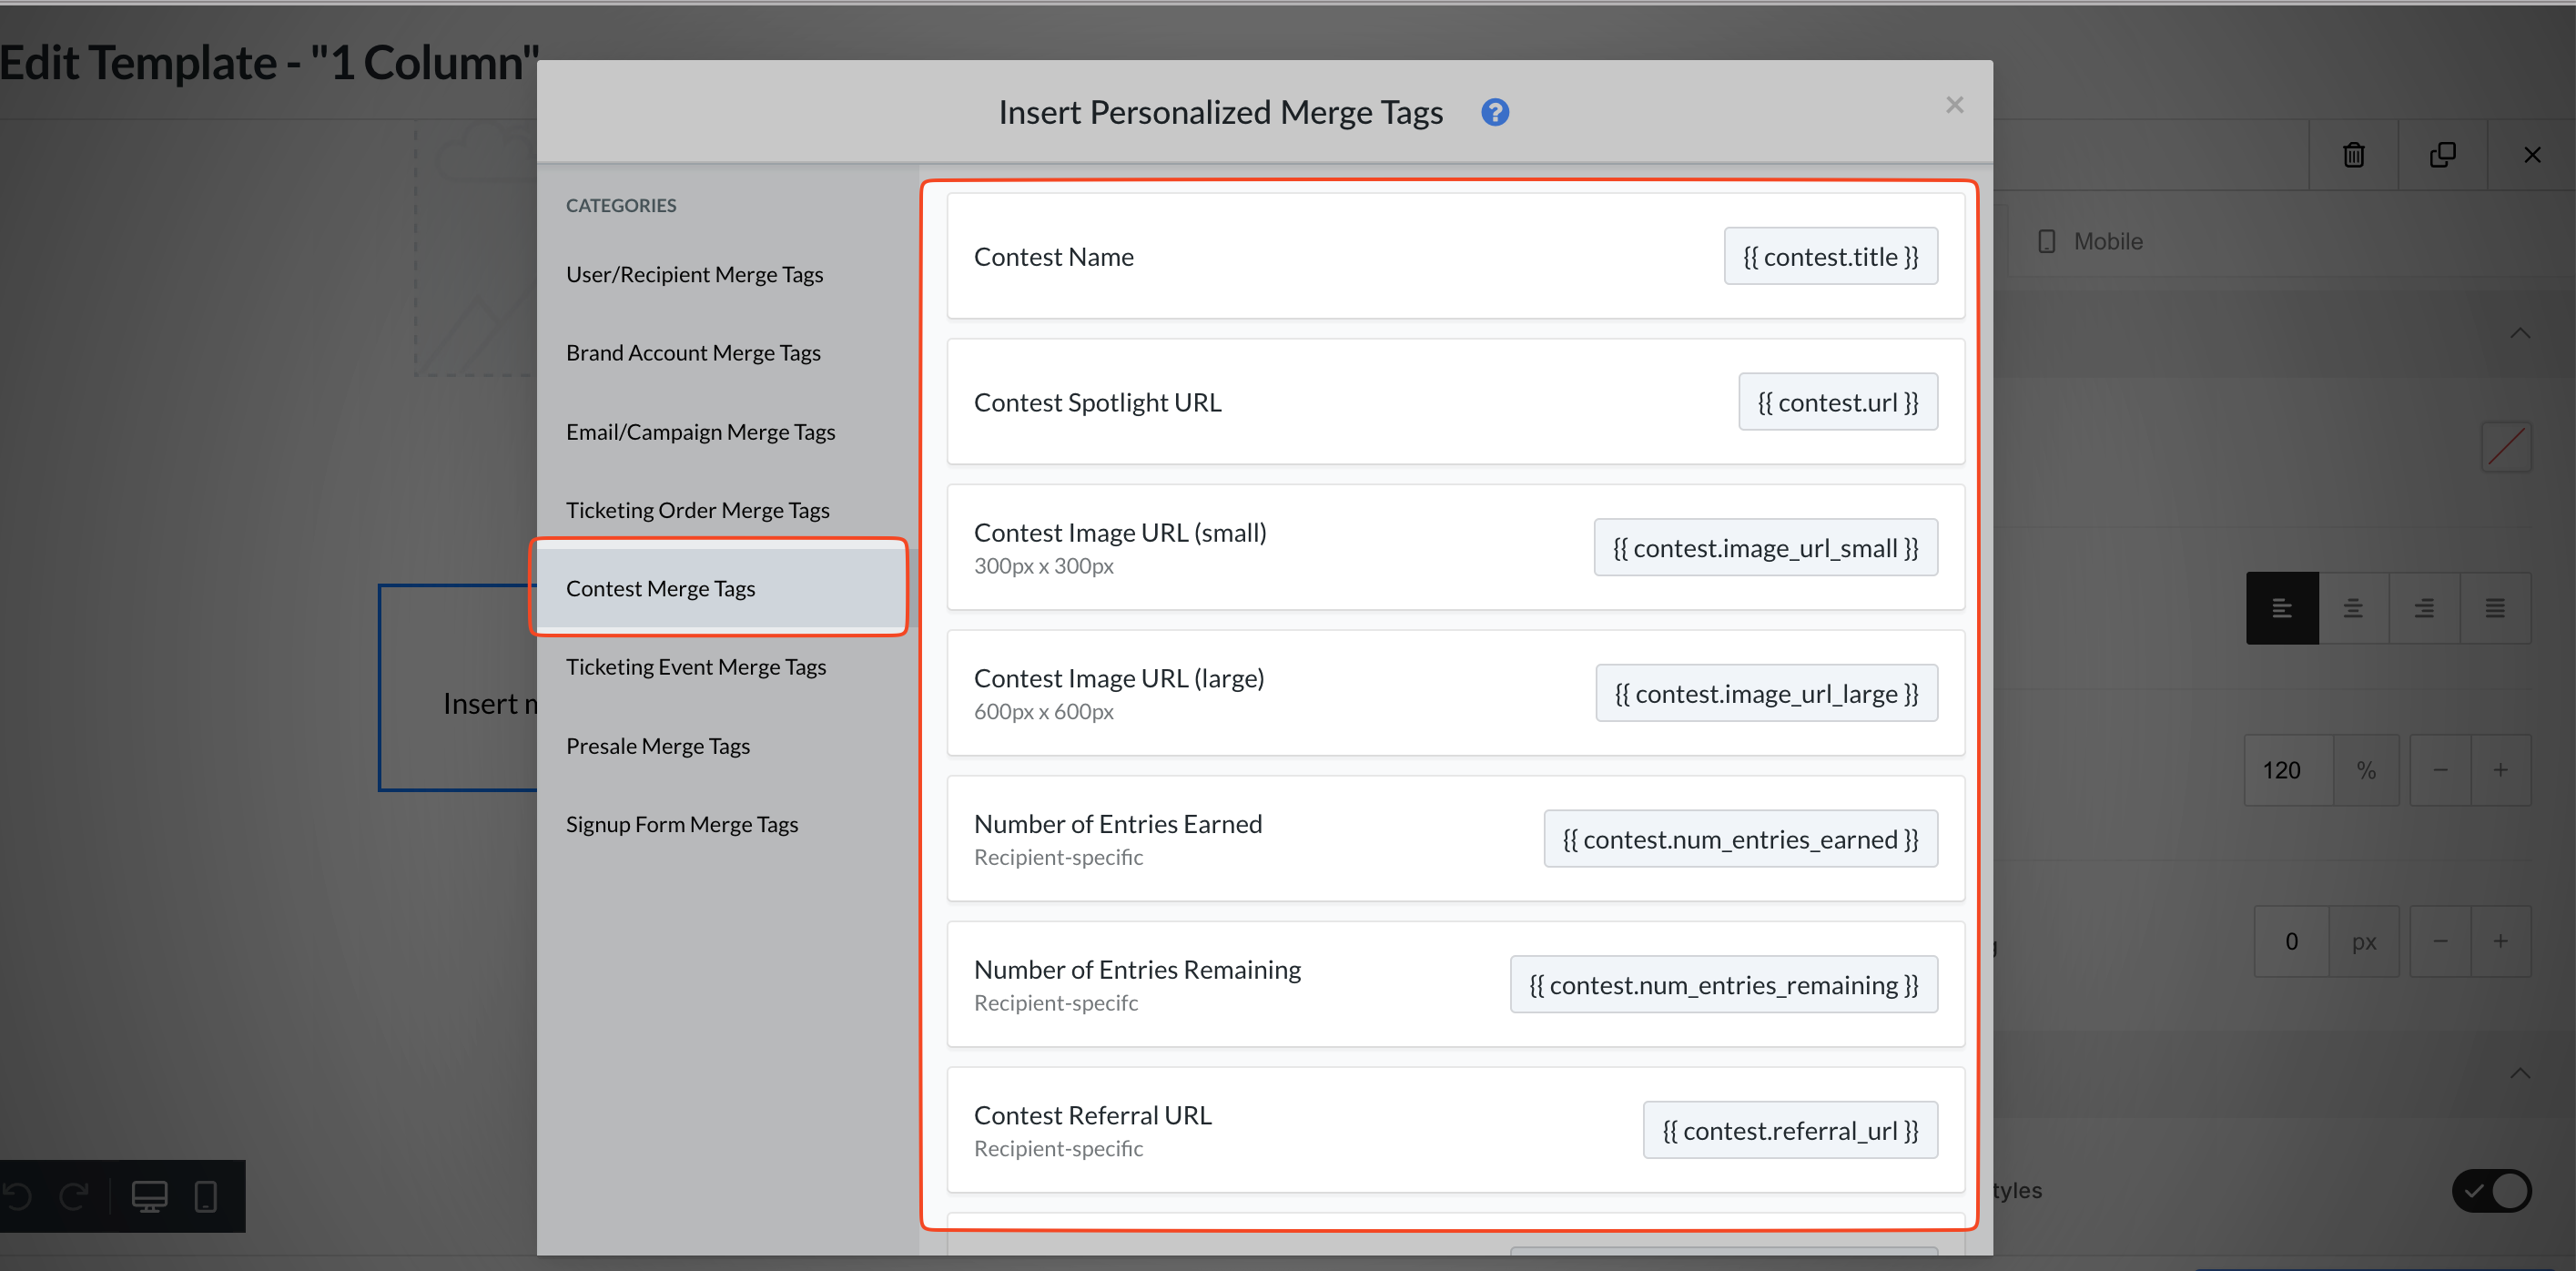
There are contest-specific merge tags you can use in your custom emails.
Share your contest
Once your contest is saved, you’ll also get:
A Spotlight page link to share
An embed code to place the contest on your website
Automating winners and follow-ups
Hive contests offer an automation feature that automatically manages winners for you. To enable it, start by checking the auto-select winners box when setting up your contest.
If you missed this step during setup, no problem—you can go back and edit the contest configuration by clicking on the contest title.
Automated follow-ups
After creating your contest, click the share button next to it and select automate SMS winners. This will open an automation template that you can easily customize to match your brand’s voice and style.
If you’d prefer to notify winners by email, simply swap out the SMS action for an email action.
Examples of follow-up messages include:
Winner: “You won! Show this message at the box office to claim your prize.”
Non-winner: “Thanks for entering! Here’s 10% off merch: [link].”
Automated follow-ups help keep fans engaged, drive conversions, and reward participants—even if they didn’t win.