
Your Contact List is the CRM hub of your Hive account—the place where contact data syncs, updates, and is easy to access. This article will walk you through how to navigate your Contact List and what actions you can
Contact List table
The contacts table shows high-level details such as name, email, phone, subscription status (blue check = subscribed, red x = unsubscribed), birth date, gender, location, and total spend.

To see a contact’s full profile—including activity history, segments, and past purchases—click the contact’s name.
Filter your table
By default, the table lists all contacts. Use filters to narrow the view (for example, signed up via a specific contest or presale, engaged with a recent campaign, or attended past events).

Click add filters and choose the conditions you need.
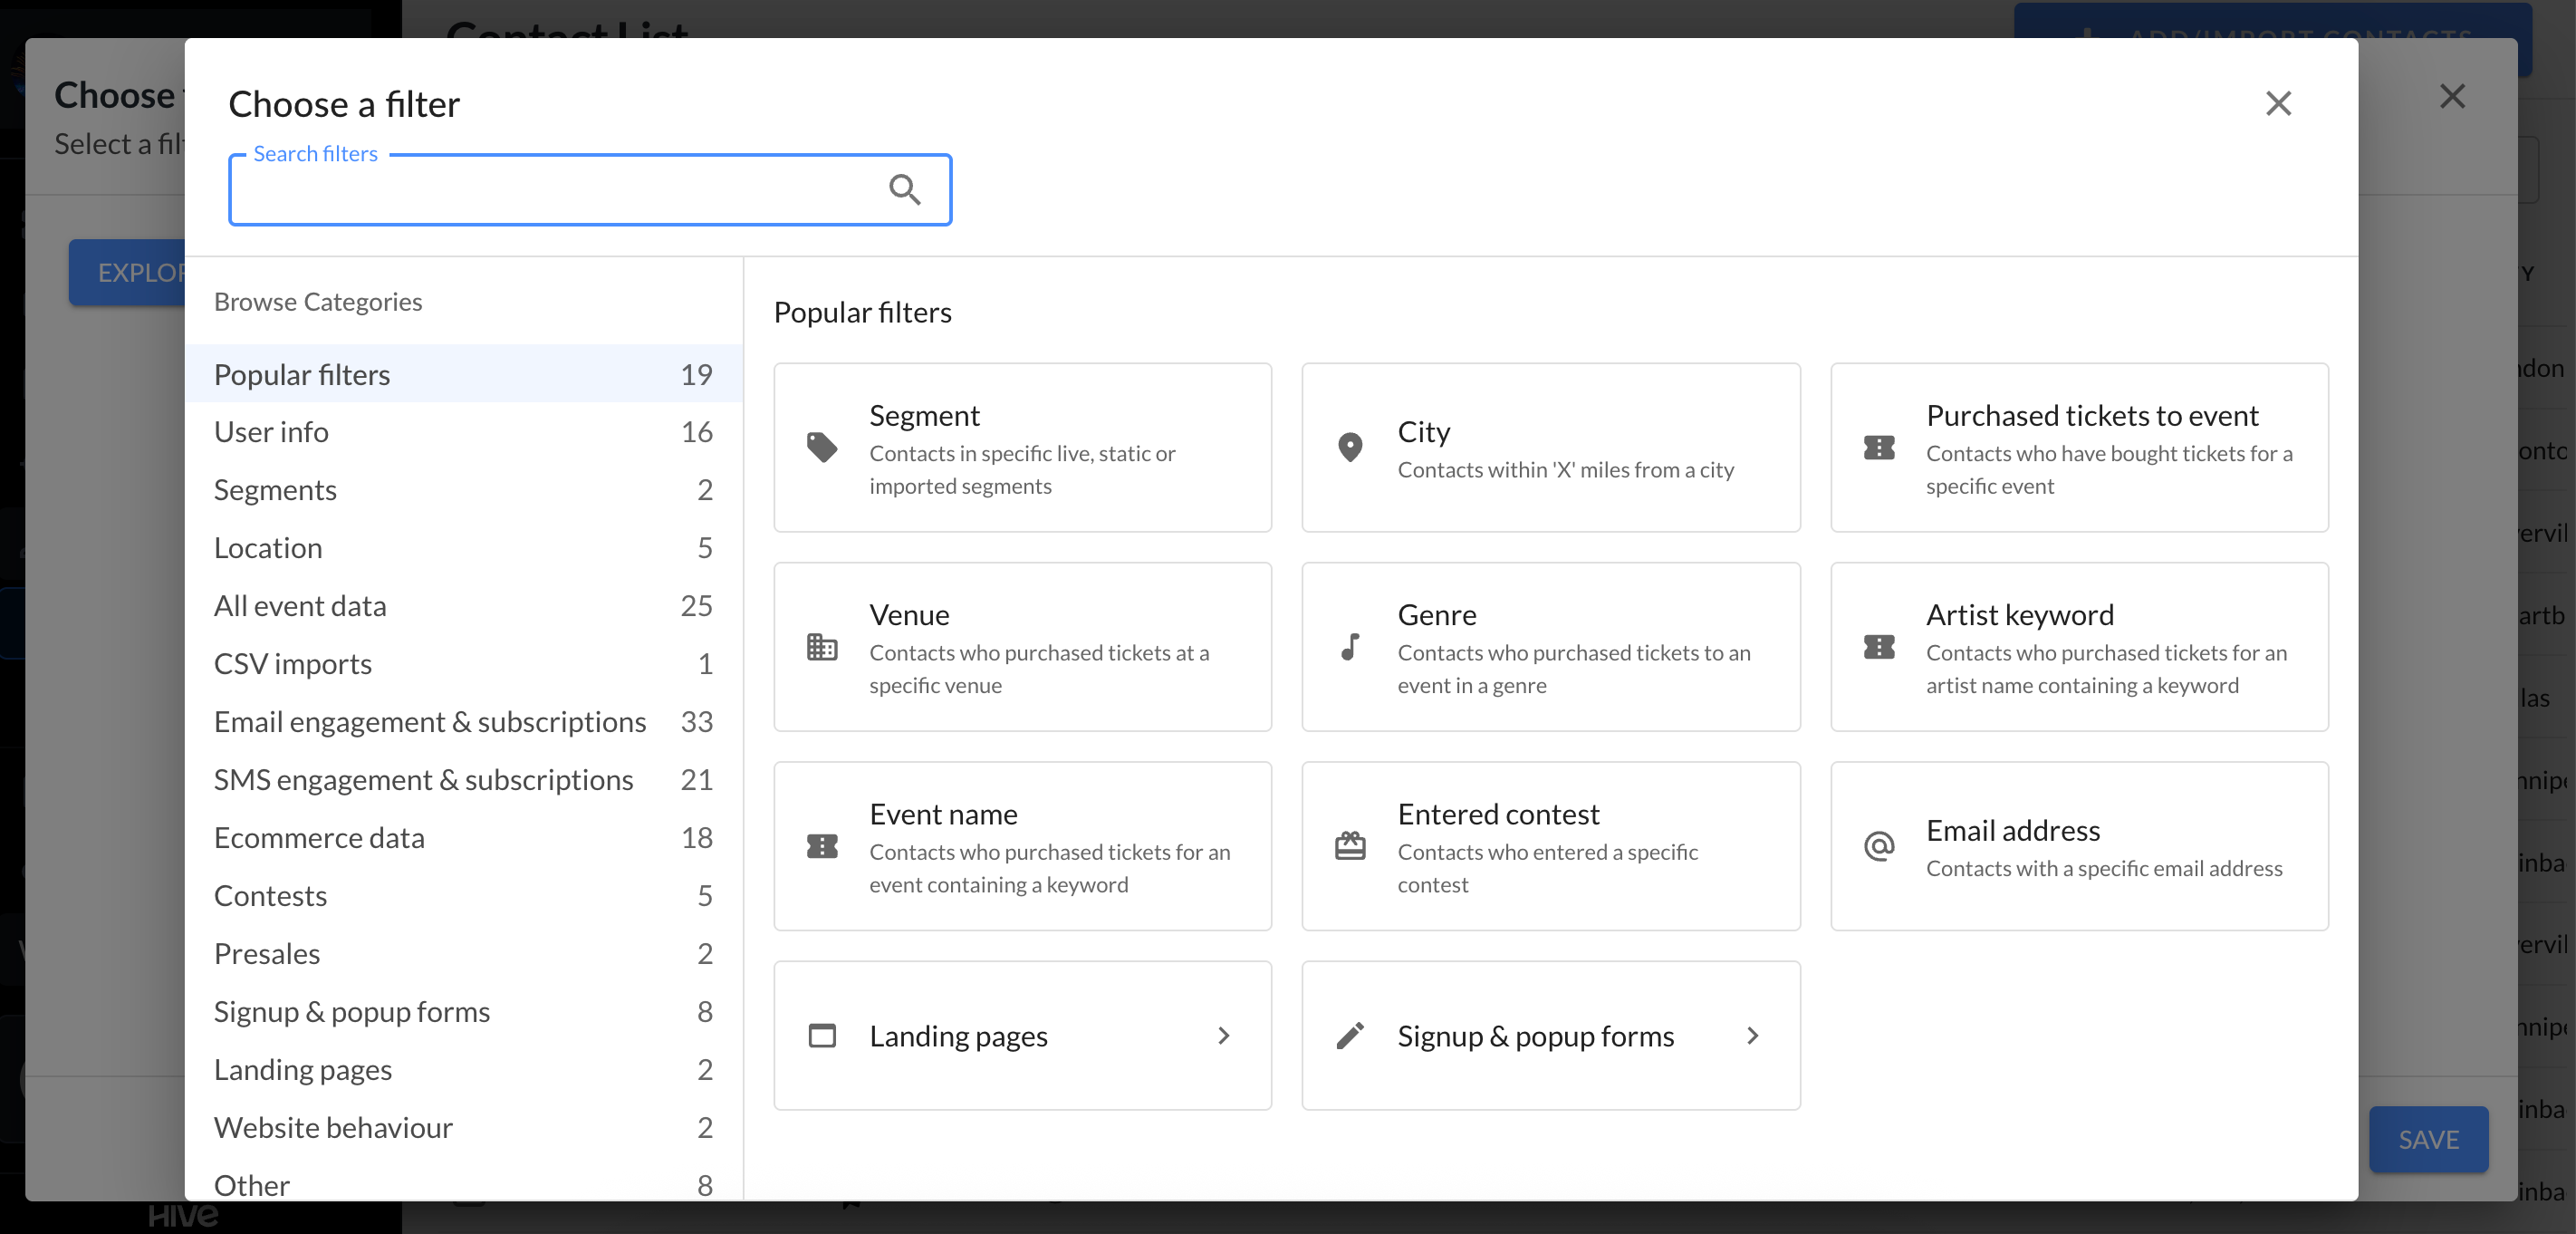
Need a refresher on available filters? Check out this help article. Pro tip: The same filters are available when building segments and campaigns.
Send an email, SMS, add to segment, or share contacts
After filtering to the contacts you want, use the top toolbar to:
Start an email campaign
Start an SMS campaign
Add the selected contacts to an existing segment
Note: from the contacts page, you can add contacts to static segments only (not live segments).
Share the filtered list with a teammate. Enter their name or email in the pop-up to send access.

Actions
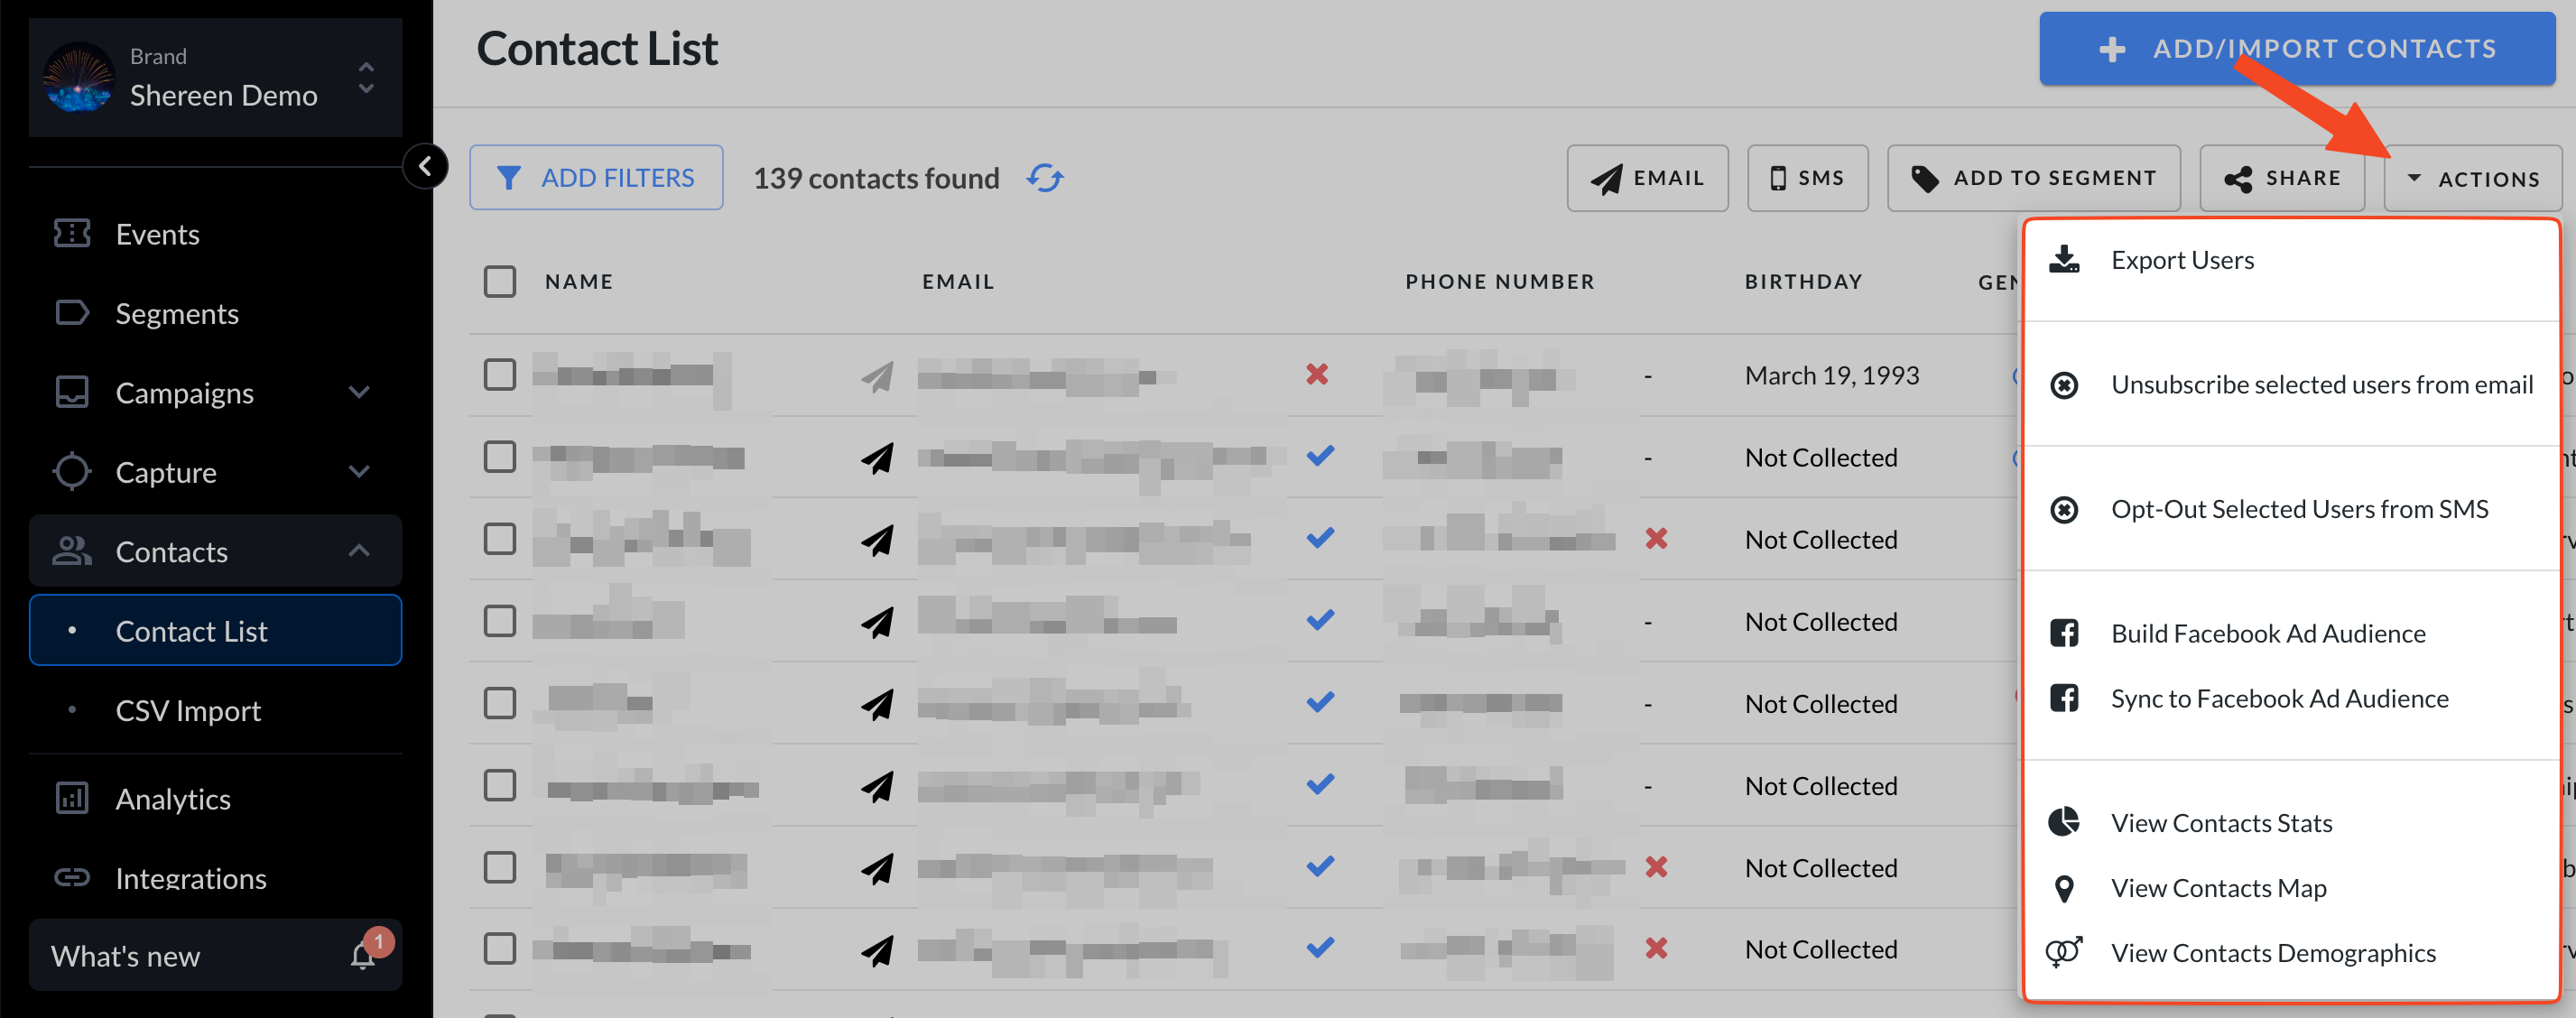
Use the actions menu (top right of the table) for additional options:
Export contact data
Manually mark contacts as unsubscribed from email or SMS
Build or sync Facebook ad audience
View contact stats, contact map, and demographics
The contact map creates a heat map of subscriber locations based on your current table view—handy for understanding geographic distribution (for example, planning local promotions or printed ads).

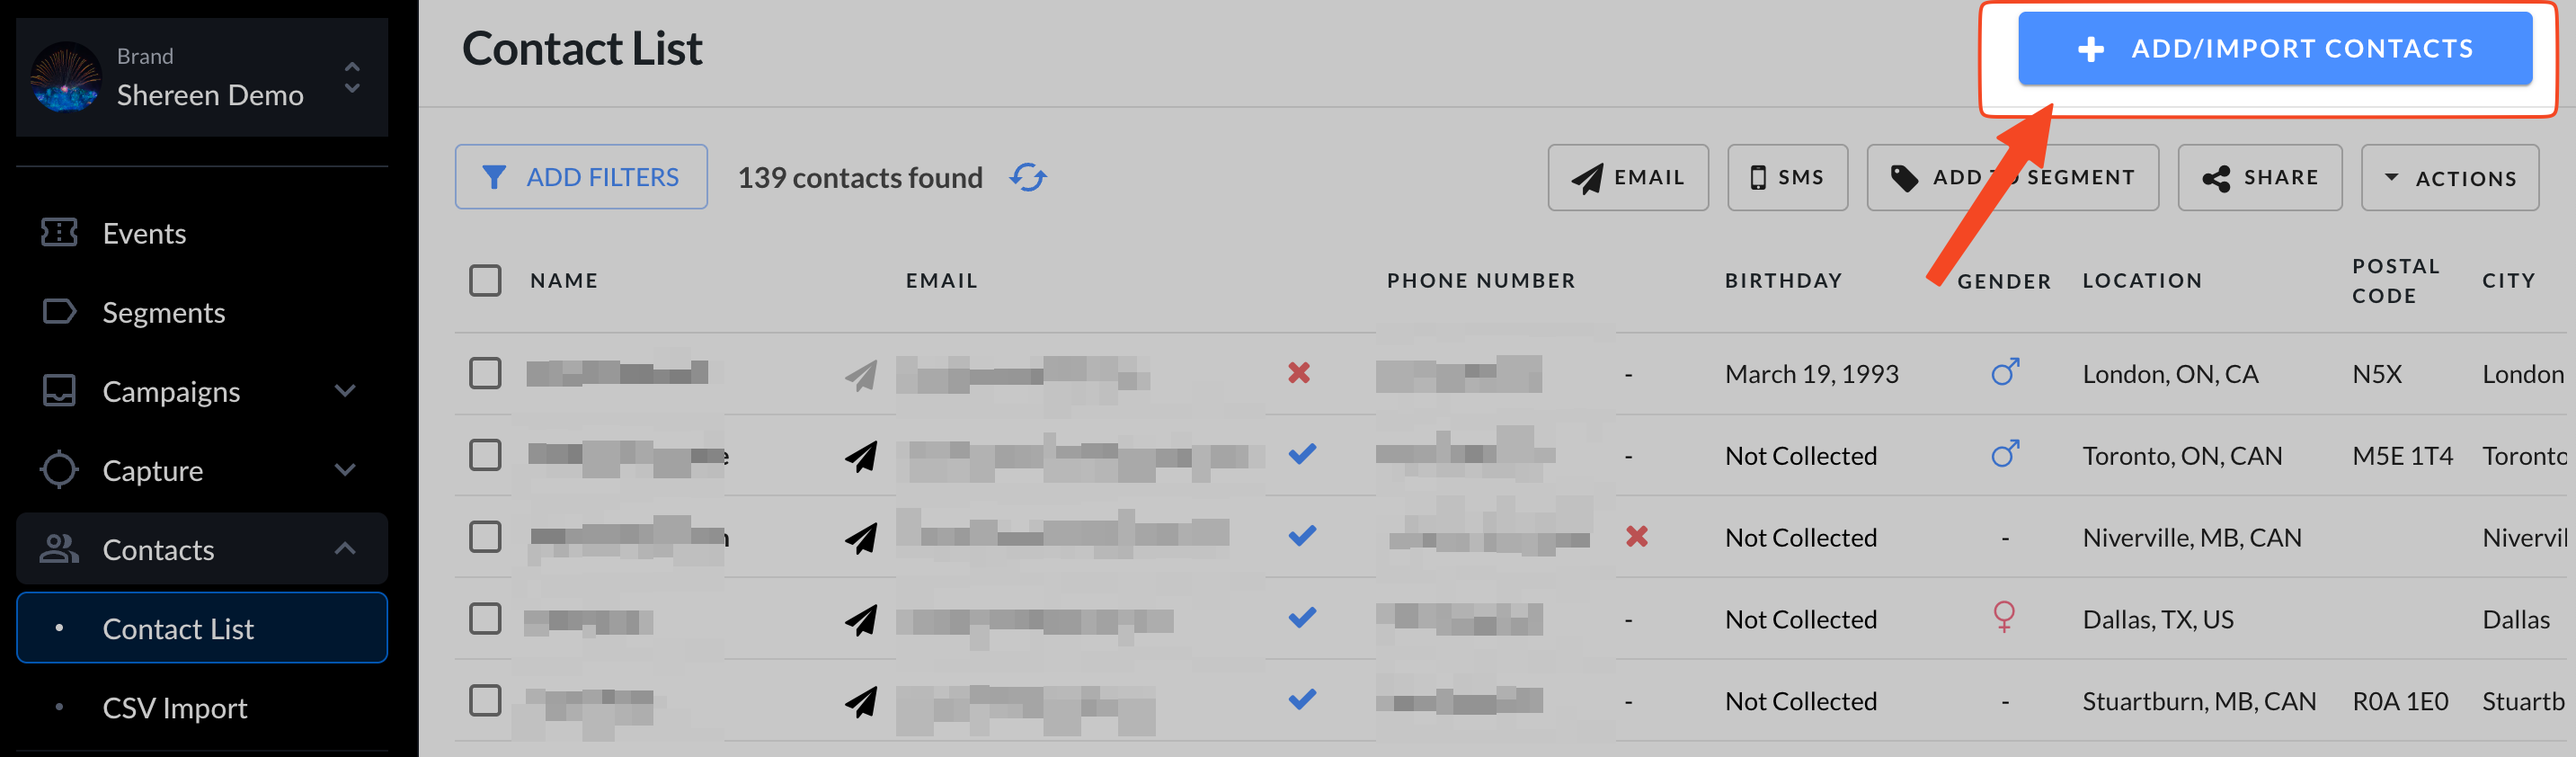
Add/ Import contacts
In the upper right corner, click add/import contacts to open the CSV import tool. From there, you can upload a file and map your fields.
Need a walkthrough? Check out this help article on importing data into your Hive account.