How does the abandoned buyer automation work?
Hive amplifies your marketing by using customer interactions with your campaigns to drive more ticket sales. When you set up an abandoned buyer automation, Hive detects when someone clicks your ticketing link but drops off, then automatically sends follow-up messages to bring them back to complete their purchase.
It’s timely, targeted, and runs quietly in the background alongside your other initiatives.
Getting started
Note: The event URL in your campaigns must exactly match the event URL in your event listing. If it doesn’t, the abandoned buyer automation won’t trigger for contacts who click the link but don’t purchase. If you’re not sure where to find the event URL:
Go to your Events page.
Find the event and click on its title to open the event hub.
Click Edit event in the top left.
From there, you’ll see the ticketing URL synced from your ticketing platform—this is the URL you should be using in your campaigns.
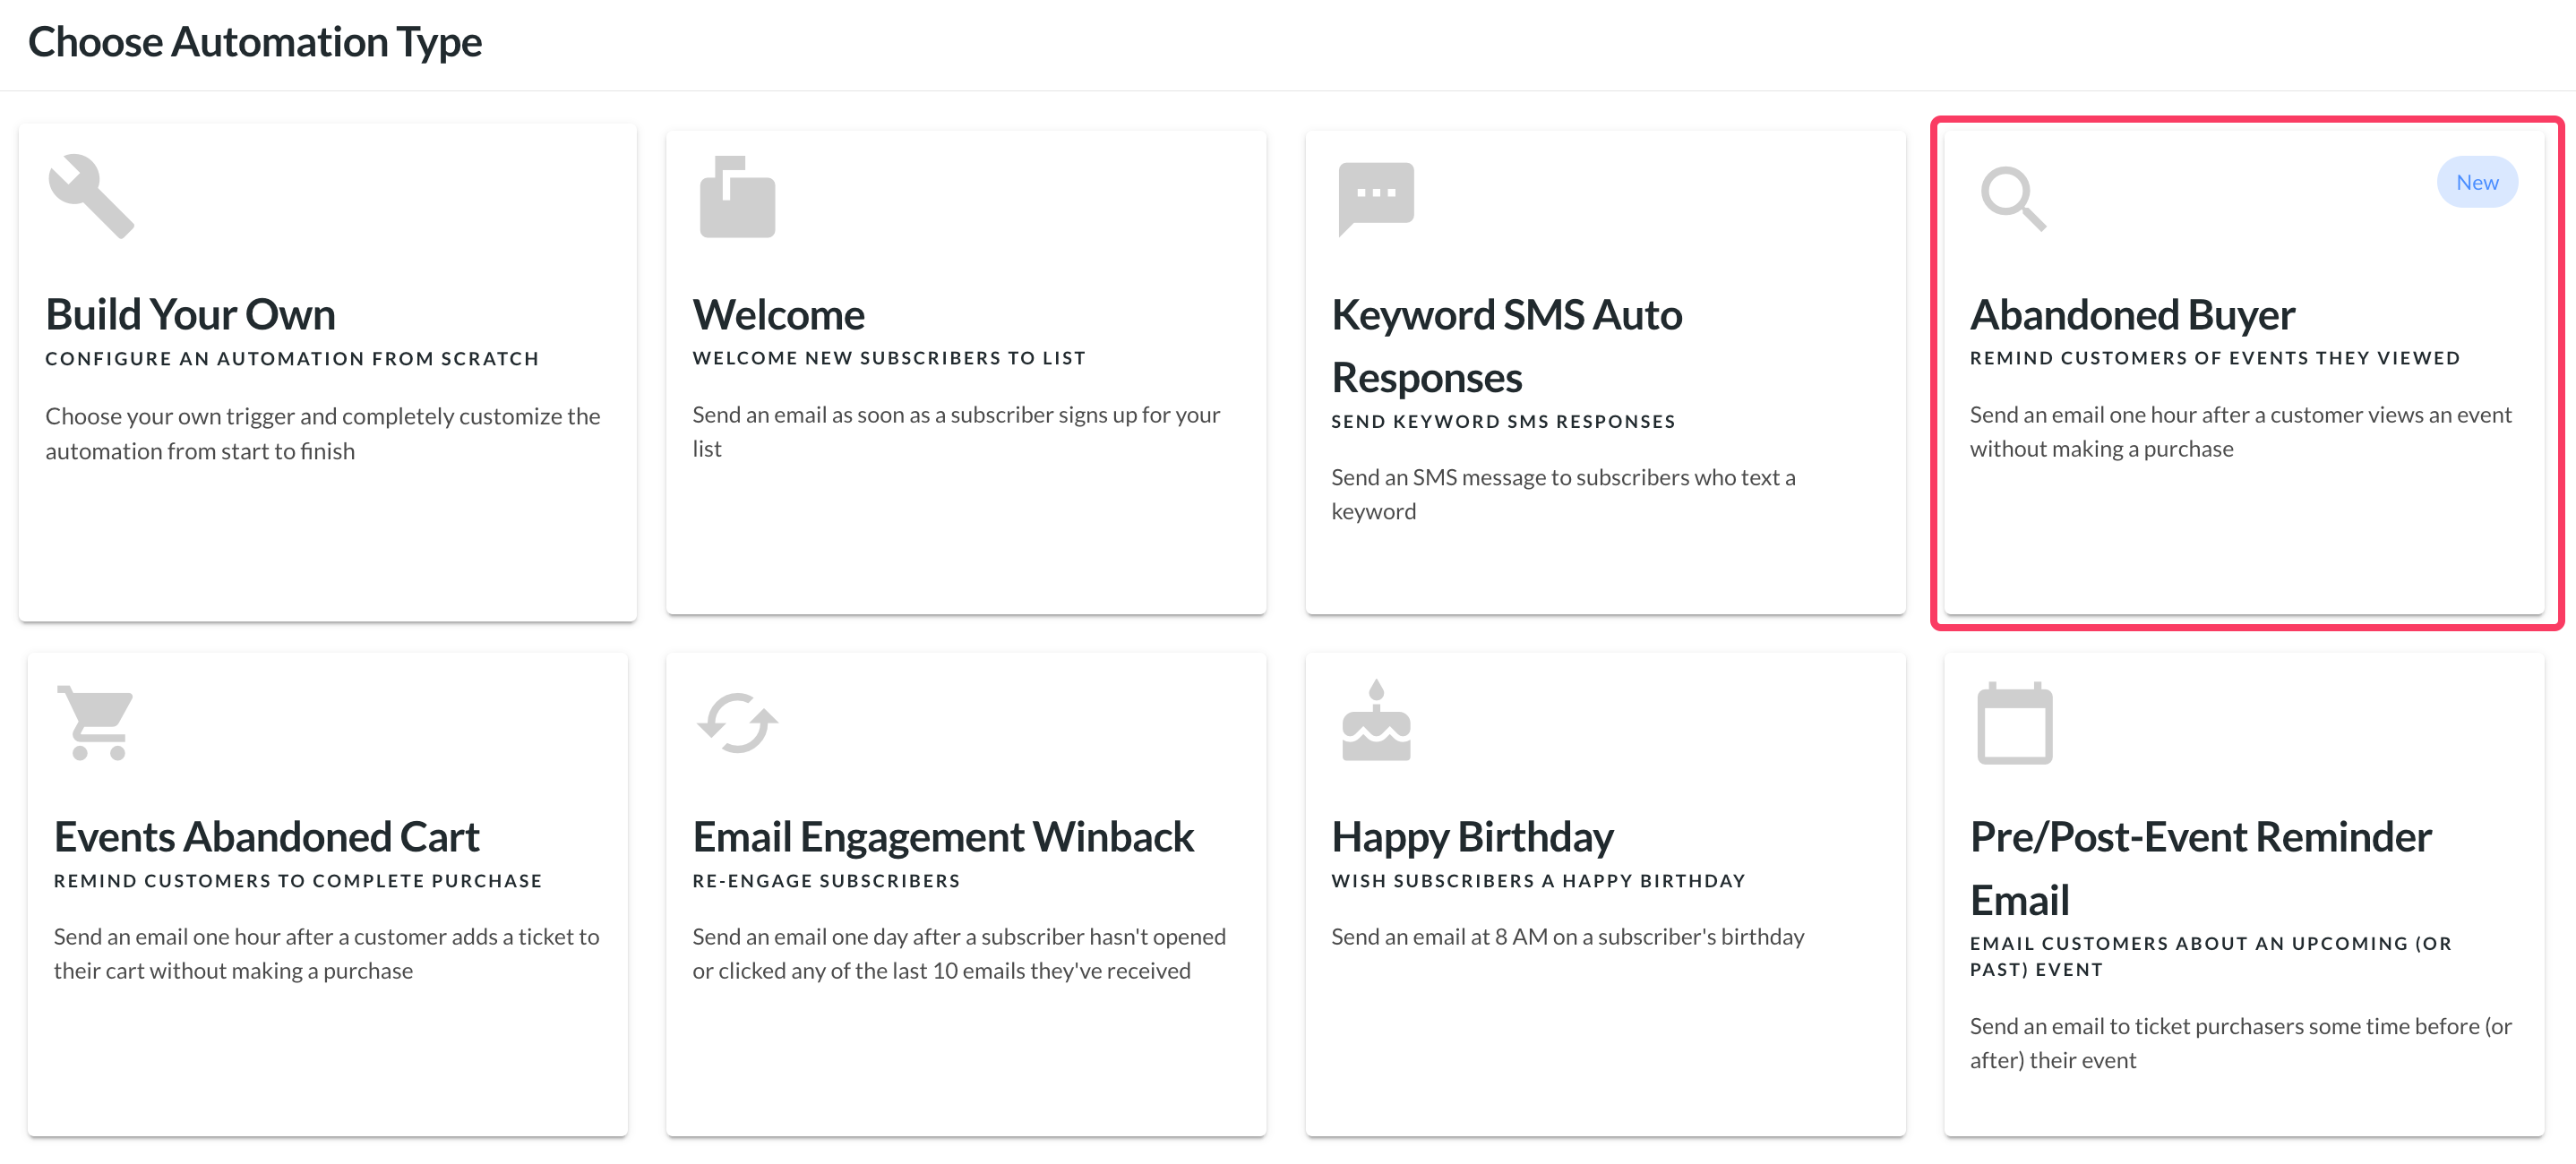
To set up an abandoned buyer automation, go to Campaigns in the left-hand navigation, select Automations, then click New automation.

Then select the "Abandoned Buyer" automation.
Editing your automation
Good news! The abandoned buyer automation comes prebuilt and is a great starting point. We recommend customizing the messages to reflect your brand and boost results:
Email and SMS messaging: Personalize copy to match your tone, style, and branding while keeping the core flow intact.
Keep it simple: The goal is reach and recovery—avoid adding unnecessary steps or complexity.
A few thoughtful edits will add a personal touch and help the automation deliver maximum impact.
Global rules
Global Rules let you fine-tune who gets follow-ups, so you can focus on the right audience.
Each rule's evaluated before running every action of the automation. If a user no longer meets the criteria specified by the global rule, they'll be removed from the automation before the next step takes place.
In the screenshot below, you can see the default global rules for the abandoned buyer automation.
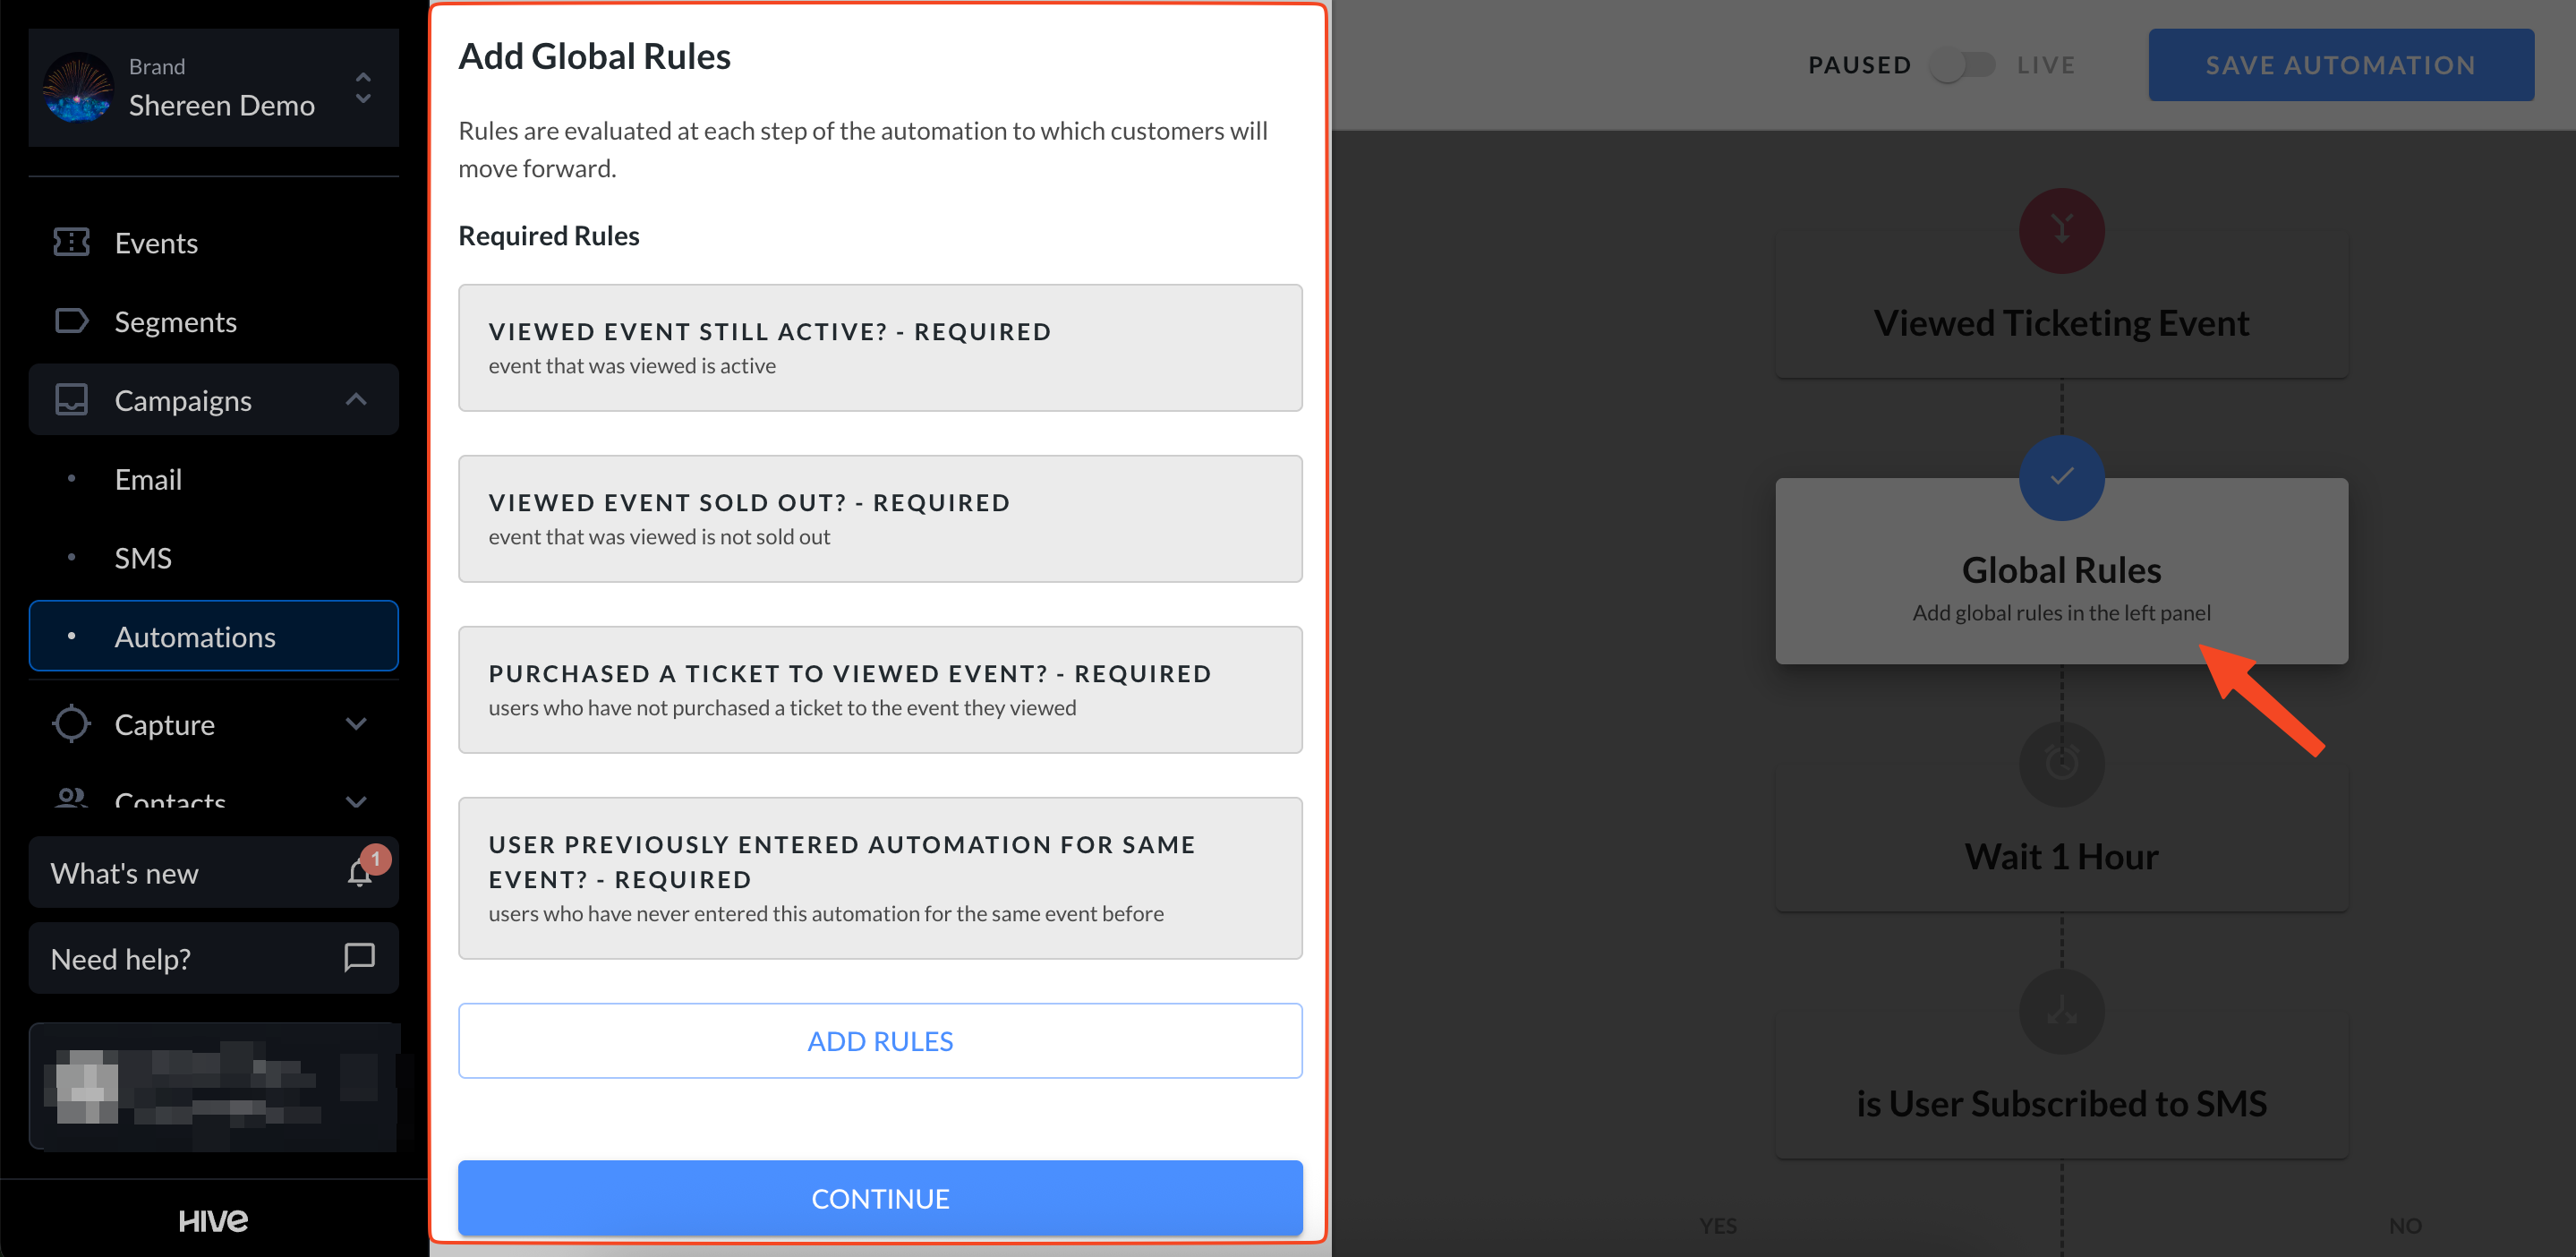
The default global rules are in place to avoid sending the automation for events that are sold out or inactive. It will also not send the automation to users who may have purchased a ticket after clicking the link, but before the automation message sends.
Selecting "Add Rules" will allow you to further specify which users you would like to target, but feel free to leave it as the default rules, as this will target the highest number of contacts.
Time delays
Next, configure the time delay step. By default, it’s set to 1 hour, but you can adjust it to fit your workflow.

Time delays give customers a chance to complete their purchase before follow-up messages are sent, ensuring better timing.
Once you've settled on a length of time, hit "Save Time Delay" in the bottom left-hand corner of the automation window.
Split
In this automation, the split step determines whether the customer receives an SMS or email based on their subscription preferences.

A split lets you route contacts down different paths based on behaviour, subscription status, or profile data, so your messaging stays relevant.
To edit a split, select the Split step in your automation, update the condition (for example, “purchased in the last 90 days,” “subscribed to SMS,” or a specific city), and save to direct contacts accordingly.
Keep conditions simple, test one variable at a time, and name branches clearly (e.g., “VIP” vs. “Non-VIP”) to make reporting easier; for more detail, see the full article on automation splits.
Messaging
Now, with our split setup, we have one path for customers who are subscribed to SMS, and one a second path that will email customers not subscribed to SMS.
You can edit both email and SMS directly in the automation.
SMS
Select the SMS step in the automation to open the editor. From there, you can edit the message just like any regular SMS campaign.

Once you're happy with the message, hit "Save SMS". If you're new to SMS in Hive, our article on Getting started with SMS and MMS is a perfect place to start.
Note: Keep the {{ event.name }} and {{ event.url }} merge tags in your message, as they dynamically update based on the customer’s clicked link.
To learn more about merge tags, check out this help article.
To edit the email, select the Email step in your automation. You can update the campaign details directly there (subject line, sender, etc.).
To modify the template itself, click Edit (shown below). A new window will open with the template editor, where you can make changes and save.

Note: Keep the {{ event.name }} and {{ event.url }} merge tags in your message, as they dynamically update based on the customer’s clicked link.
Once you're happy with the template and campaign details, hit the "Save Email" button in the automation.
Additional steps
Want to expand your automation? Click the '+' to add extra steps and fine-tune the automation to fit your strategy.

Automation settings
To open an automation’s settings, click the gear icon next to its name.
From here you can:
Update the automation name.
Adjust re-entry timing (default is 1 day). Increase this if you want to prevent contacts from re-entering too soon.

Save and set live
When you’re satisfied with your abandoned buyer automation, click Save automation.
When you’re ready to launch, switch the toggle from Paused to Live, then click Save automation again.

That’s it—your automation is live and working to re-engage customers who clicked but didn’t purchase, helping you recover missed ticket sales.